How To Import My Staff Roster
(This process is designed exclusively for new staff registrations. To update assignments for existing staff members, you will need to handle each update manually for each individual staff member.)
Utilizing the staff roster import feature allows you to efficiently add multiple new staff members at once. Here's a step-by-step guide on how to do it:
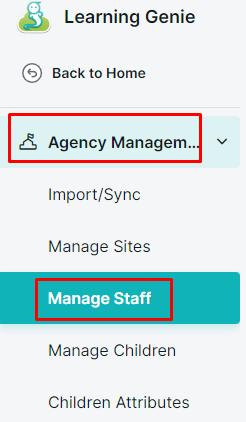
1. From the Web Portal, click on the "Admin Settings" button.

2. Click on the "Manage Staff" tab under Agency Management.
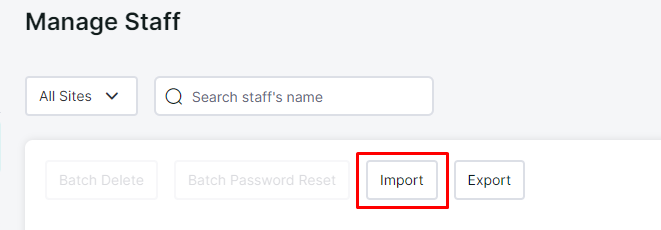
3. Click on the "Import" button.
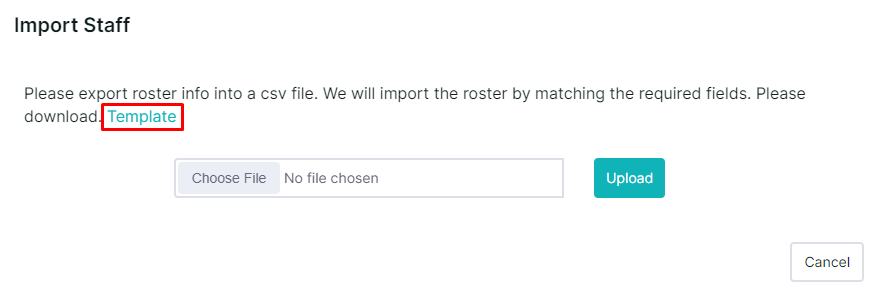
4. Upload your .csv file by clicking on the "Choose File" button and clicking the "Upload" button.

Note: If you need the template to create your Roster File, simply click on the "Template" button to download it.
IMPORTANT:
Role is required. Roles are not assigned automatically during a manual staff import, so every row must include a valid role.
Assignment requirements vary by role:
Agency Admins have access to all centers and classrooms. No Center Name or Classroom Name assignment is required, so these columns may be left blank.
Site Admins have access to all classrooms within their assigned centers. A Center Name is required, while the Classroom Name column should be left blank.
Teachers only have access to the classrooms they are assigned to. Both Center Name and Classroom Name are required.
For multiple assignments:
Use a semicolon (
;) to separate multiple Center Names or Classroom Names within the same field.A single row may contain one center with multiple classrooms assigned to the staff member.
If a staff member belongs to multiple centers with different classroom assignments, create a separate row for each center using the same email address. This ensures the correct classroom assignments are associated with each center.
Center Name and Classroom Name must match existing records exactly. The values are case-sensitive and must match the existing names character for character, including capitalization, spaces, punctuation, and special characters. Even minor differences (such as extra spaces, missing punctuation, or different capitalization) will be treated as new values and may result in duplicate centers and/or classrooms being created instead of assigning staff to the existing ones.
The uploaded file should be in .CSV format

5. Once you upload the file, the system will show you an overview of the import. Click on the "Import" button to proceed.
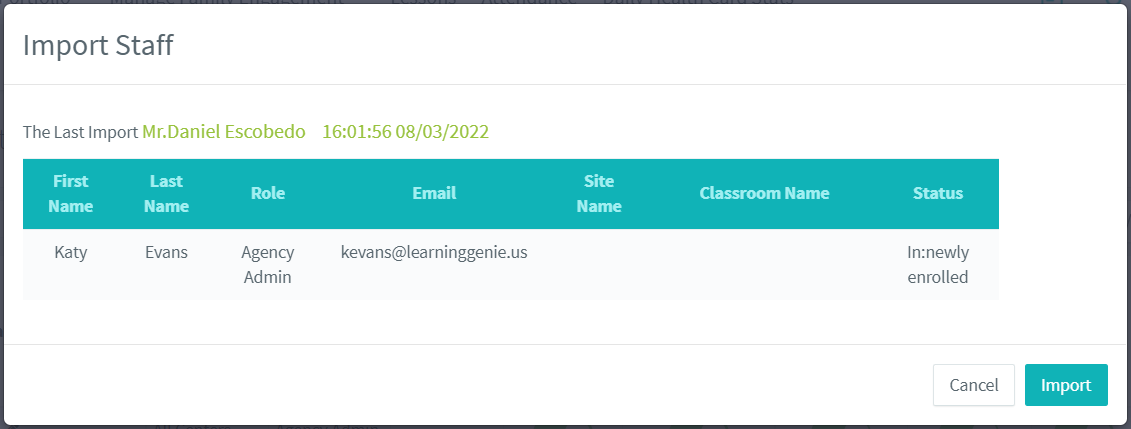
Note: You will also receive an email with the confirmation.
6. The system will show you a confirmed summary of the import. Click on the "Go to main page to complete setup" button.
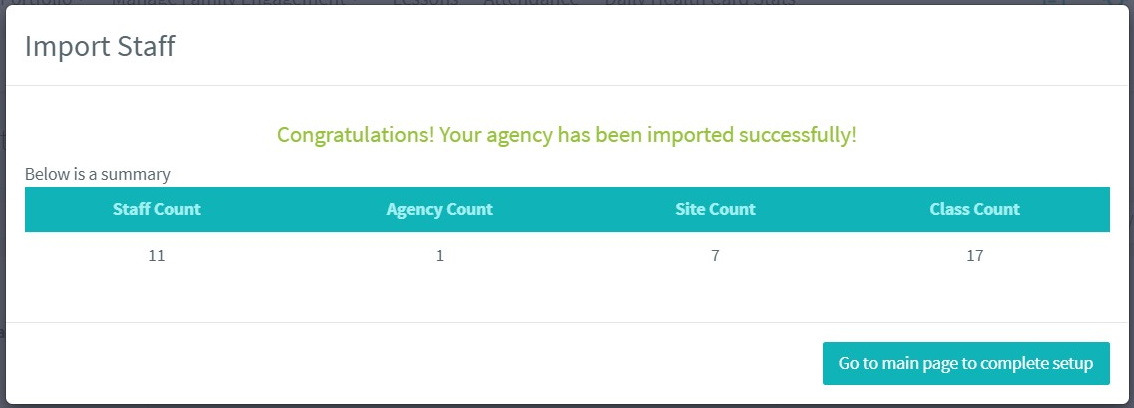
Congratulations! You've imported your Staff Roster into Learning Genie!
395 Bytes Download
Need Help?
If you run into issues or have questions, the Learning Genie Support Team is here for you!
Email: help@learning-genie.com
Phone: 760-576-4822