How to Import Student Roster from any SIS (Student Information System)
Before You Begin
1. Download your roster from your SIS
Export or download your student roster from your SIS.
2. Prepare your CSV file
Make sure your roster is saved in CSV (Comma Delimited) format and includes, at minimum, the following required fields:
Site Name
Class Name
Children First Name
Children Last Name
Birthday
Gender
Entry Date
Additional Fields Required for California Programs
For California programs using Learning Genie's DRDP Online API integration to upload ratings to the state system, additional information is required.
You can download the spreadsheet at the end of this article to view the complete list of roster fields available in Learning Genie and their corresponding values.
Field Key:
🔴 Red column headers: Minimum required fields for Learning Genie
🔵 Blue column headers: Additional fields required for DRDP Online
Tip: If you need a template for your roster import, follow the instructions through Step 3 below to download the Learning Genie import template.
Import Your Roster
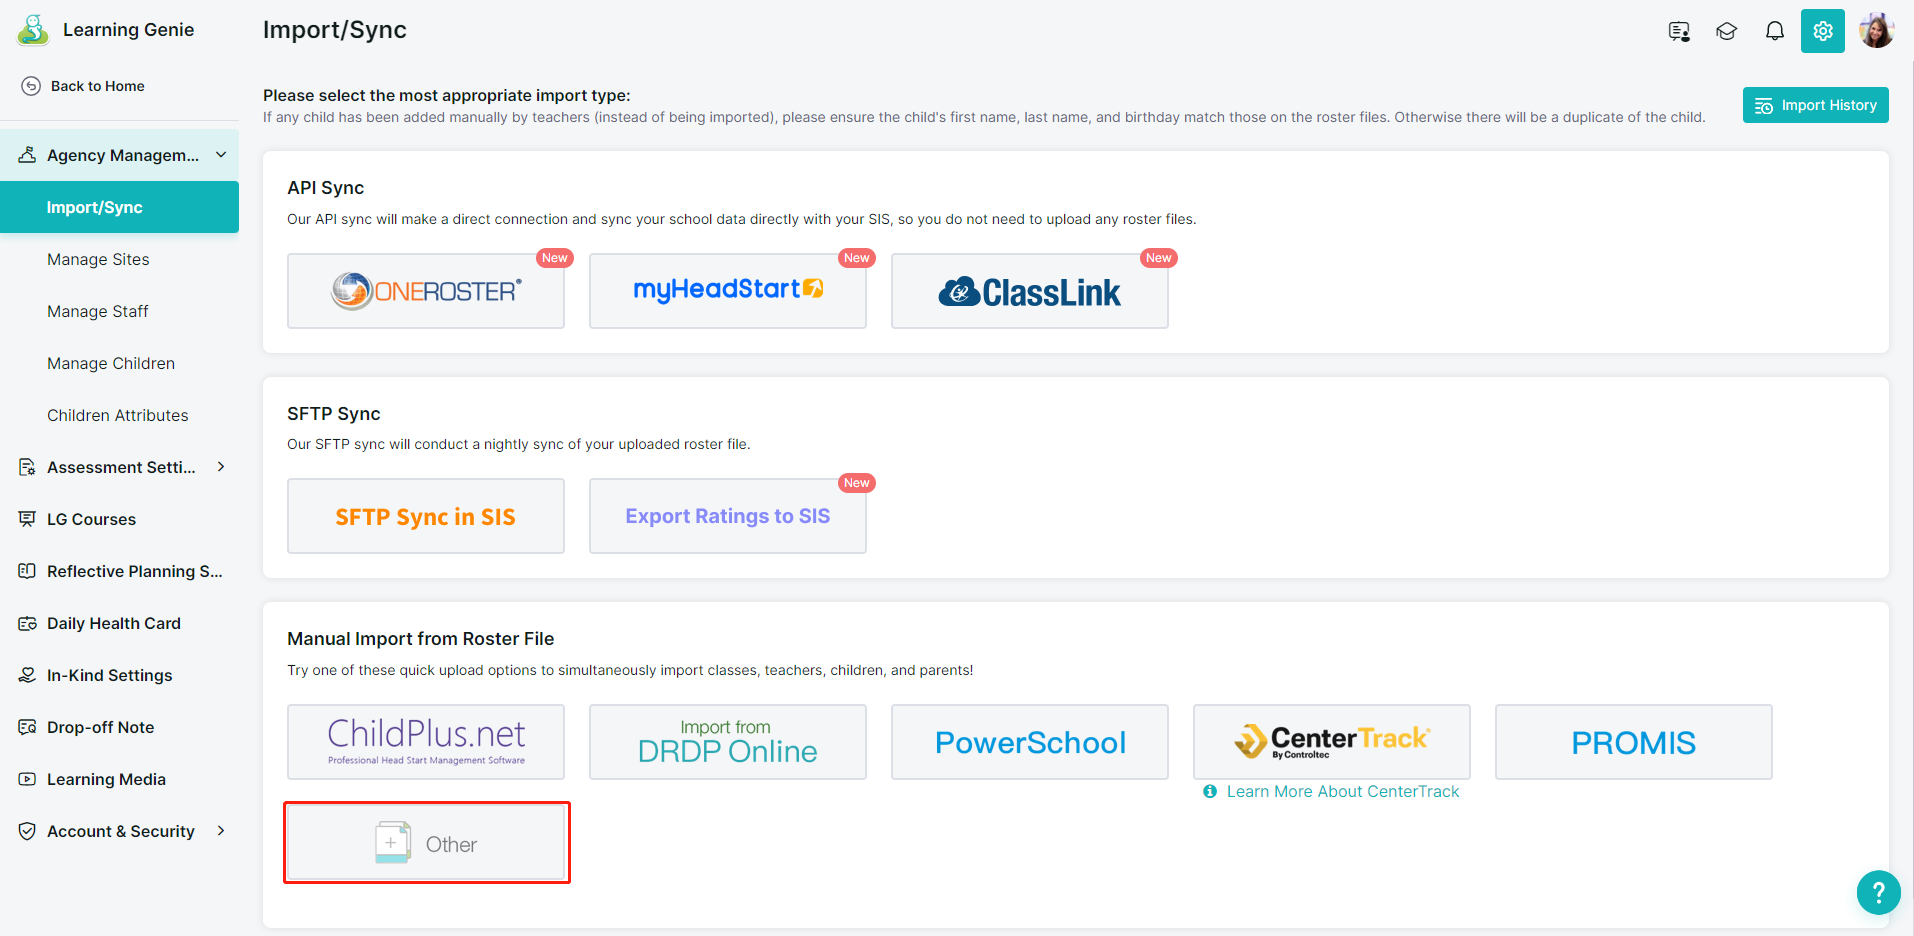
3. Go to the Manual Import page
In Learning Genie, go to:
Admin Settings → Import/Sync → Import/Sync Settings → Manual Import → Other

4. Upload your CSV file
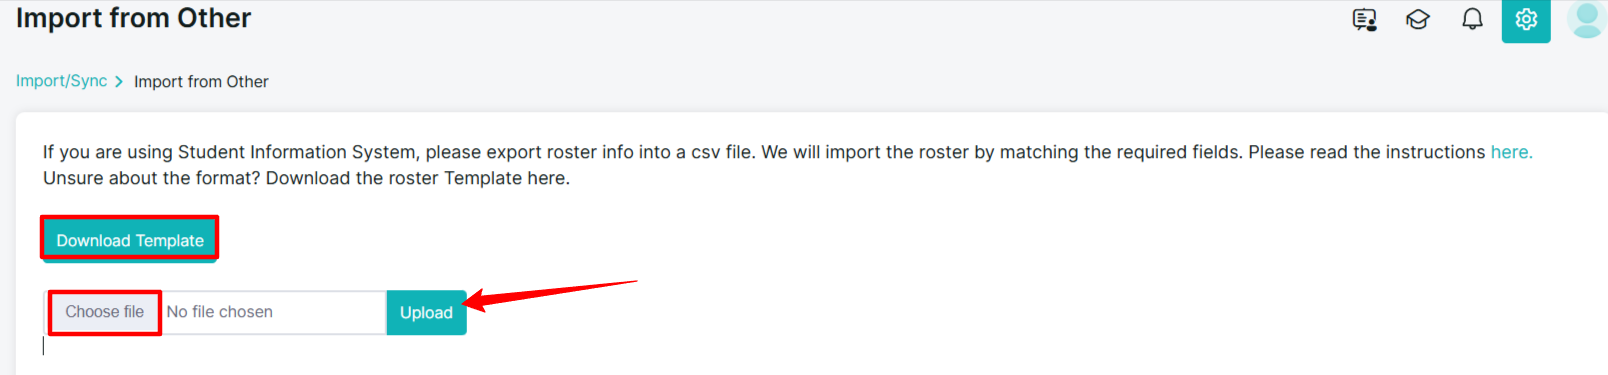
Upload your prepared CSV file.
You can also download the Learning Genie roster import template from this page if you need a template.
5. Map your roster fields
Map each column from your CSV file to the corresponding field in Learning Genie.
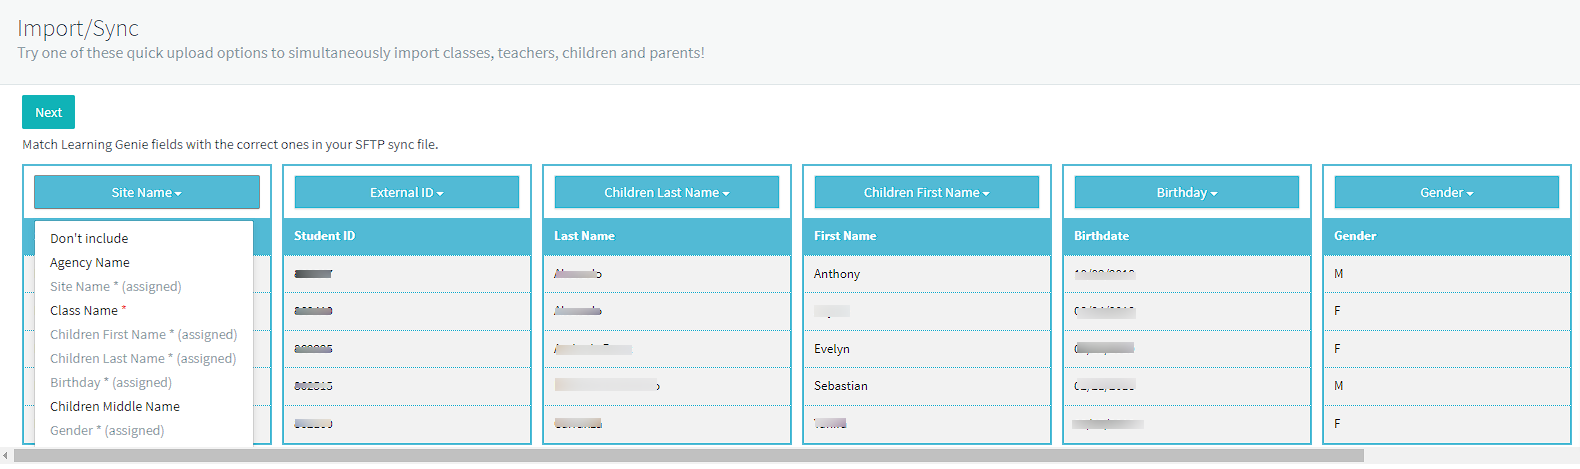
Tip: Make sure each column is mapped to the correct field before continuing. Incorrect field mapping may result in inaccurate roster information.
6. Review the checking file
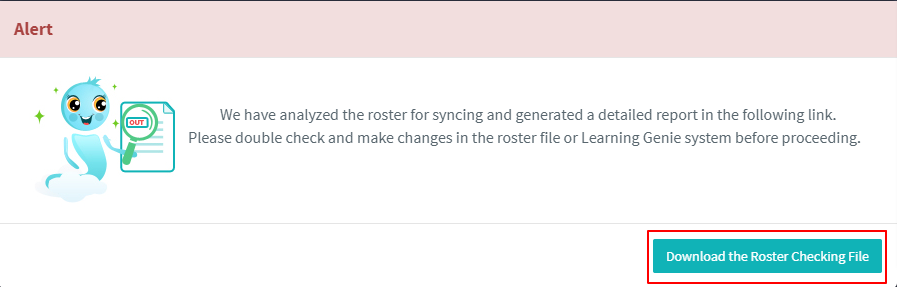
Carefully review the checking file to confirm that all sites, classrooms, children, and other information will be imported correctly.
Clicking the checking file will open the information in a new browser tab as a spreadsheet. Once you have finished reviewing the file, simply return to the Learning Genie tab in your browser to continue with the import process.
7. Import your sites and classrooms
After reviewing the checking file, the available import options will depend on whether your roster contains new sites or classrooms.
If the import contains new sites or classrooms:
Select Import New Sites/Classes and proceed to Steps 8–9 below.
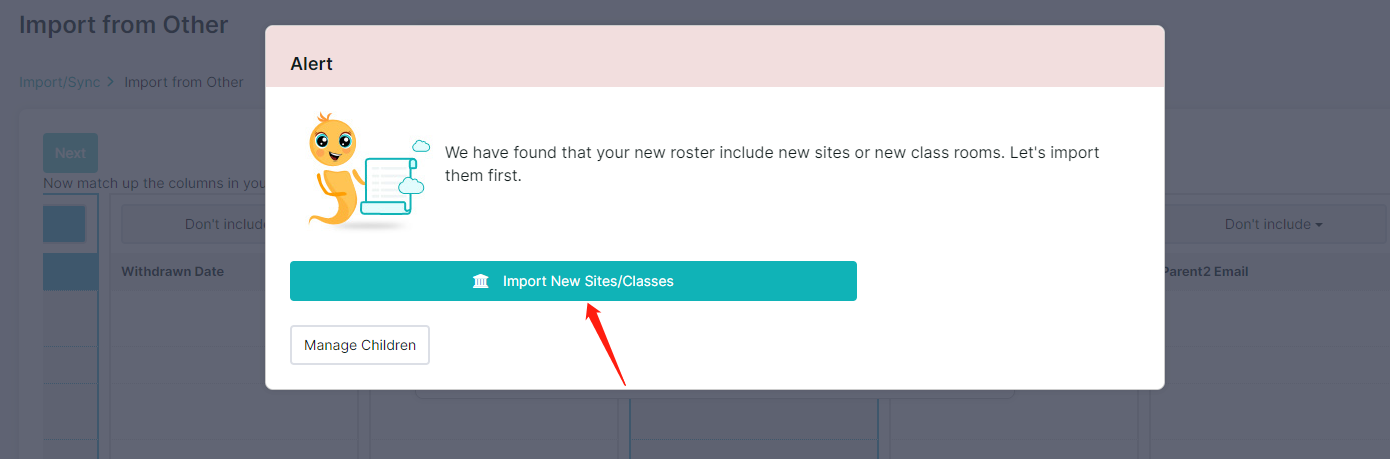
If there are no new sites or classrooms:
Select Routine Sync and proceed with the import.
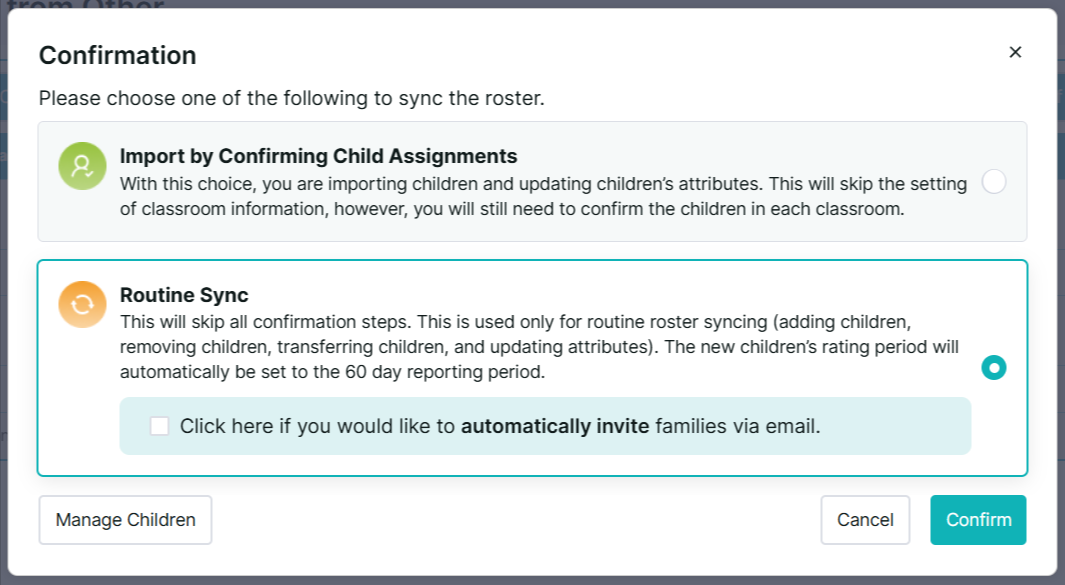
Note: Steps 8–9 only apply when you are importing new sites or classrooms.
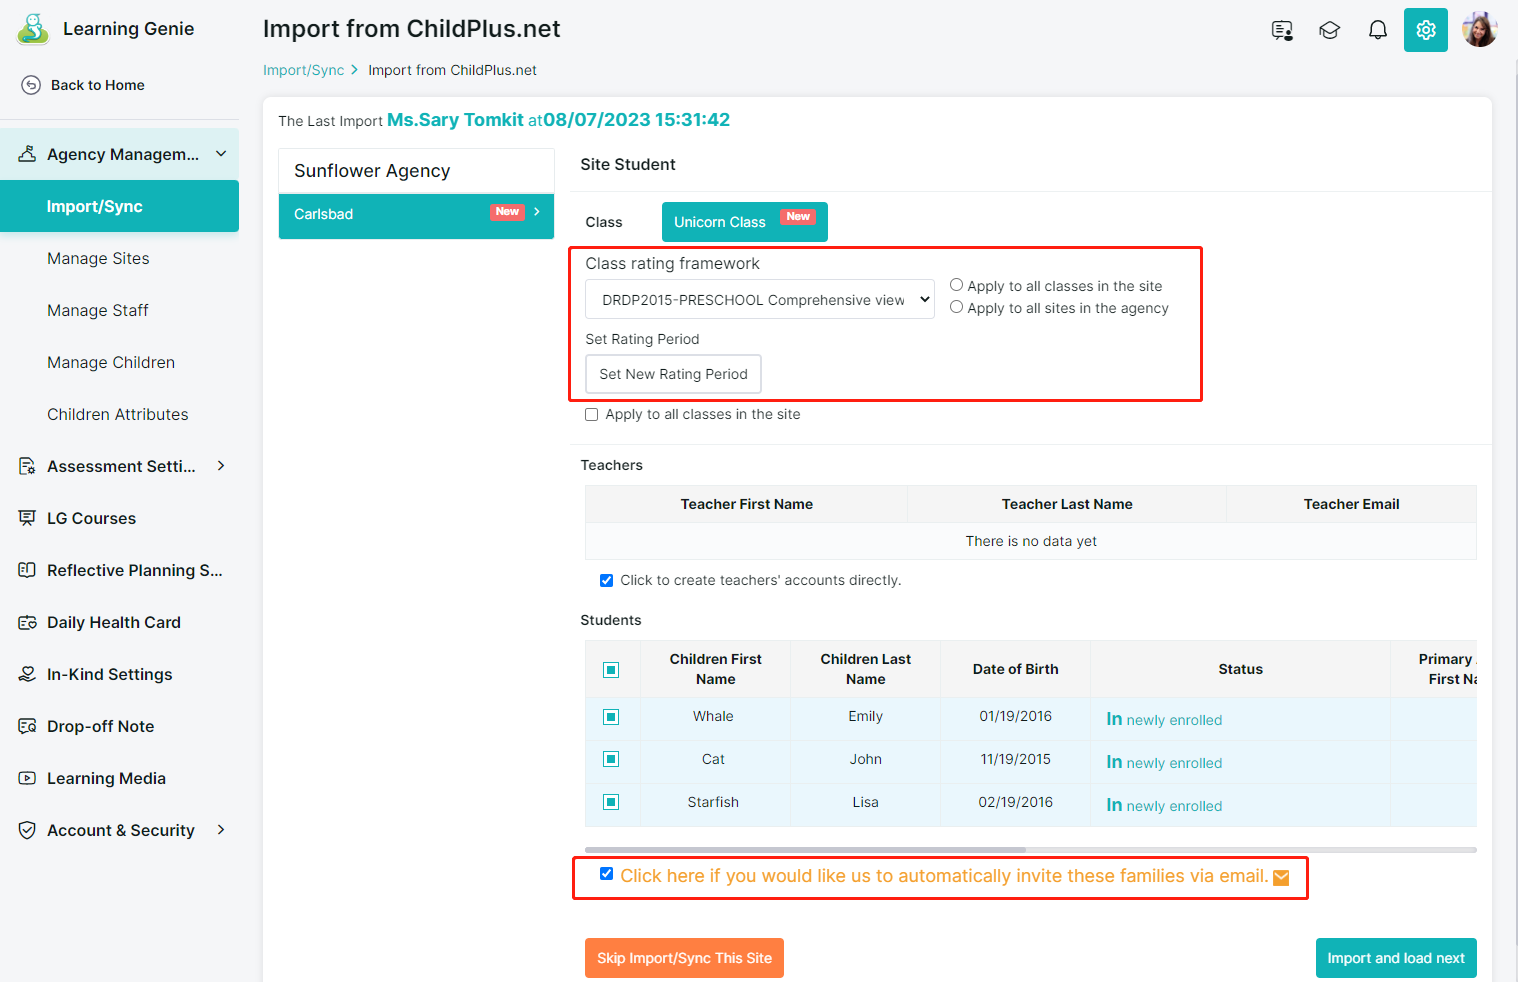
8. Configure your imported classrooms
Set up the framework and rating period for the imported classrooms.
You can also complete this setup later if needed.
At this stage, you can also:
Create teacher accounts
Automatically invite families via email
9. Import the next file
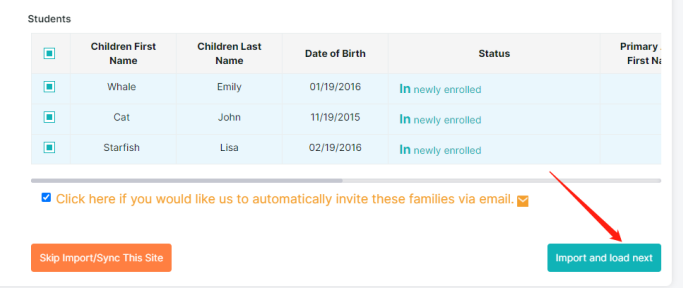
Click Import and Load Next to continue importing additional roster files, if needed.
Repeat the steps above as necessary.
10. You're all set!
Congratulations! Your student roster has been successfully imported into Learning Genie.
Video Tutorial
For additional guidance, please watch our video tutorial below:
Roster Fields and Values
Download the spreadsheet below for a complete list of Learning Genie roster fields and their corresponding values.
This spreadsheet also identifies the fields required for Learning Genie and DRDP Online.
Genie and DRDP Online.
Need Help?
If you run into any issues or have questions about importing your roster, our Learning Genie Support Team is here to help!
Email: help@learning-genie.com
Phone: 760-576-4822